Sunday, June 27, 2010

Paruppu Podi (Lentils Powder)

I am looking ahead for a bc week...hope all goes smooth. Have just started baking goodies and serving them for guests. Have also treated few office collegues with my choc cake and pizza....I was so happy to receive their comments :) I was jumping in joy(though not physically;)) when one of my friend said I hate pizzas outside but this home made one is too gud, soft and perfect after tasting my pizza :) So why am I talking abt baking when this post has nothing related to it....here I promise there are more baked goodies coming up few are even low fat versions.

Paruppu podi also called as Lentils powder is very popular in South India. There are so many versions of this podi, have just started to make them at home.All these days was relying on the store bought ones...esp aachi and MTR brand paruppu podis are too gud.
Paruppu Podi Recipe
Ingredients:
  • Toor dal/thuvaram paruppu - 1 cup
  • Red chillies - 2 big ones
  • Black Pepper corns - 1 tsp
  • Peanuts - 2 tsp [optional]
  • Garlic - 6 to 8 flakes
  • Salt - as required
  • Oil - 1 tsp
  • Curry leaves - few
Paruppu Podi Recipe
Method:
  1. Add oil in a kadai, Roast red chillies and toor dal till toor dal turns light golden brown.

  2. Now add pepper corns and peanuts and roast for 2mins.Add curry leaves and roast till it becomes crispy.By this time the dhal would have turned golden brown.

  3. At this stage cool down and grind it with salt to a coarse powder, keep aside.

  4. Crush the garlic coarsely, add it to the above mixture and grind it again to a powdered texture.

  5. Store in an air tight container and use when needed.Mix in rice with ghee / oil and enjoy!!
Paruppu Podi
I have read in a book that adding raw garlic in the final stage gives good flavour of garlic to the podi and enhances the taste too!
Paruppu podi is one of our favourite podi/powder which is eaten as an accompaniment to hot rice or even idlys. I like to have it with hot rice topped with ghee :)

What else do you want on a lazy day....just add this podi and ghee with hot rice and enjoy the taste!!
Sunday, June 20, 2010

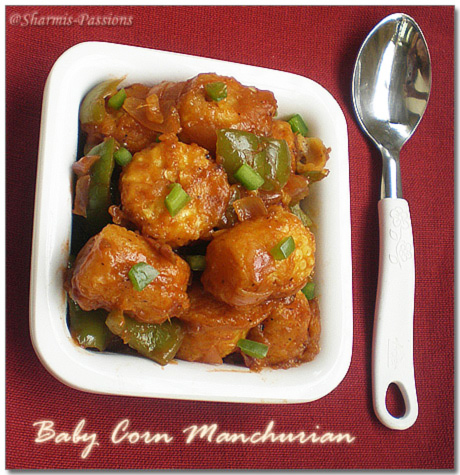
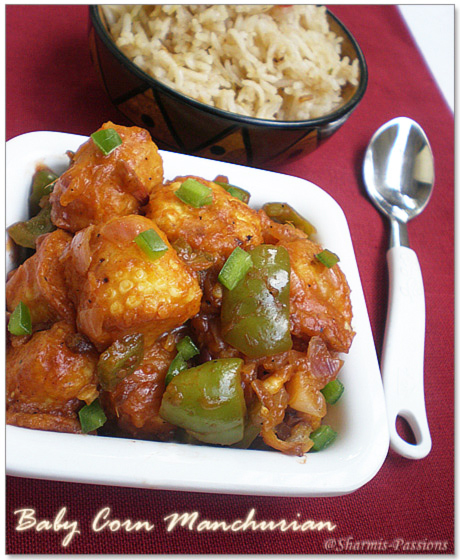
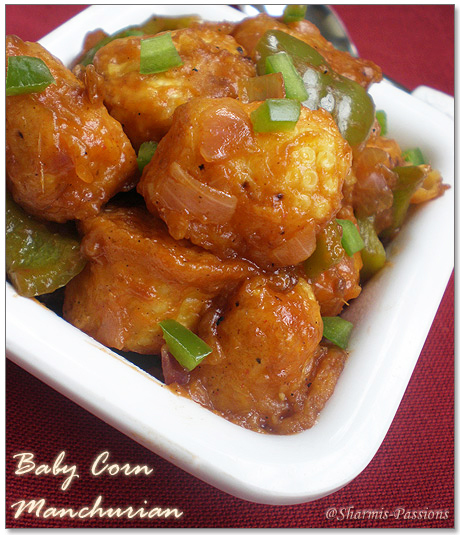
Baby Corn Manchurian

Thanks for all ur wishes....My lil one did have a nice time and enjoyed the day thoroughlly!! Now recipe time...Baby corn manchurian is almost the same as Gobi Manchurian but have added the recipe with lil adjustments in quantity. And this time I didnt deep fry them, instead toasted them in dosa tawa and there was no much taste difference. I usually use iron kadai/tawa as I feel it gets the veggies nicely fried than the non-stick ones.
Baby Corn Manchurian Recipe
Ingredients:
Baby Corn - 5 to 6 cut into 3 pieces or halved

For the batter :
  • Cornflour - 4 tbsp
  • Maida - 1 tbsp
  • Ginger Garlic paste - 2 tsp
  • Red chilly powder- 1 tsp
  • Salt-to taste
  • Oil- to toast
  • Orange color - optional
Method:
  1. Pressure cook baby corn for 3 whistles with water. It should only be half cooked, Drain water and keep aside.

  2. Mix all the above ingredients with little water to form a thick batter.
    Dip the cooked baby corn in the batter and toast it with oil in dosa tawa until crispy/roasted well.
For the manchurian
  • Oil - 1 tbsp
  • Garlic sliced/paste - 1 tbsp
  • Capsicum - 1 medium size cut into ½ inch squares
  • Big Onion- 1 finely chopped
  • Soya sauce - 2 tsp
  • Tomato sauce - 2 tbsp (I usually mix with 2tsp water to form thin watery sauce before adding)
  • Red chilly powder - 1tsp
  • Salt - to taste
  • Spring onions - a handful (Most of the time I run out of stock when I do manchurians so dont search in mine ;))
  • Corn Flour - 1.5 tbsp mixed with 3 tbsp water
Baby Corn Manchurian Recipe
Method:
  1. Heat oil and saute the sliced garlic, onion and capsicum for 3mins. Let the onions and capsicum retain its crispiness and do not let them turn brown.

  2. Now add the red chilly powder and salt,mix well. Keep in high flame and add soya sauce and mix continuously for a few seconds.

  3. Simmer and add tomato sauce water mixture to this, mix well. Now add the cornflour water mixture and mix well till it gets thick.Add toasted baby corn in it and mix well.

  4. Saute for 3-4 minutes to absorb excess water. Baby corn should be well coated with the sauce, then switch off.The baby corn pieces should be a little crispy and not soggy at this stage. Serve hot!
Baby Corn Manchurian Recipe

Sunday, June 13, 2010

Basic Vanilla Sponge Cake for a celebration!

Hurray! A new cocoon for sharmispassions....Yes from blogspot, sharmispassions has moved to its own domain www.sharmispassions.com...It almost took 2 weeks for me to get convinced to go ahead with this name for .com....becos reading more about SEO (Search Engine Optimisaiton) confused me to opt for a change....I was with around 20 names to shortlist....but then finally I felt this name was my identity in this blog world and wanted it to remain the same :) so went ahead with it! This is the final post with 'blogspot' watermark :)


It was my long time thought to move to my own domain but something or the other took more priorities that stopped me from doing it.But I was particular not to delay further and this should happen in June as its a special month for me....yes my lil one is nearing her 1st bday on June 19th.... its even more special as she was born on my fathers bday....What more blessing can I ask out of life?!
Vanilla Sponge Cake
And finally here I am with my dream come true :) Thanks to all my friends and readers for all ur encouragement and support....wishing for the same in future too!! Waiting to hear ur feedback or suggestions. The transition and redirections are not completely over....its in process but that doesnt affect anything on the front end...But do let me know if you have any problems!


Its celebration time with this yummy vanilla sponge cake....this is hubby's favorite. To be true I made this for his bday and it was lying in drafts for a long time....dusted it out for this celebration :) Okay now going on to the recipe:


Ingredients:
  • Maida or APF - 200 gms
  • Butter - 200 gms (at room temperature)
  • Eggs - 2
  • Powdered Sugar - 200 gms
  • Vanilla extract - 2 tsp
  • Salt - one pinch (optional)
  • Baking powder - 1 tsp


Vanilla Sponge Cake


Method:
  1. Sieve maida and baking powder twice and keep aside. This is for evenly mixing of baking powder with the flour.


  2. Beat the eggs till soft and fluffy with a blender or mixer. The egg should be almost doubled in size showing the frothy texture on top.I blended using the normal mixer till fluffy.


  3. Next, lightly beat butter and sugar together till nicely blended [The butter should be at room temperature before mixing it with sugar] Add the beaten eggs to this.


  4. Mix the egg butter sugar mixture well, add vanilla essence and mix well. Now add salt and mix well again.


  5. Gently add the flour little by little(may be in 2-3 parts) stirring continuously. Make sure no lumps are formed. I started first with a spatula but ended up with my hands for mixing :)


  6. Preheat the oven at 180 deg C for 10 mins. Meanwhile transfer the batter to a greased tray and bake it for 30-35 mins.


Vanilla Sponge Cake
Needless to say the aroma and taste. The cake comes out so soft and moist!! This is the only piece of cake I could reserve to click and test for the next day :)

Monday, June 7, 2010

Vegetable Pulao / Pulav

Finally the drizzles are here and I'm loving the climate completely hope this continues for the coming days as well......Had a busy week both at work and home.More busy days ahead, so am trying to keep myself prepared for them.

Coming to todays recipe vegetable pulao : This is a easy and filling one pot meal....It just needs raita to finish off the bowl. Only chopping the veggies is time consuming and even for that my chopper comes to the rescue :) If thats ready this pulao can be done in a jiffy.
Vegetable Pulao/Pulav Recipe
Ingredients:
  • Basmati Rice-1 cup
  • Onion - 1/2 medium chopped lengthwise
  • Bay leaf - 1
  • Jeera -2 tsp
  • Green chilli chopped finely -1
  • Ginger garlic paste - 3 tsp
  • Vegetables of ur choice - almost 1/2 cup[I used 2 carrots, 4-5 beans and handful of peas]
  • Oil-1 tbsp
  • Ghee-1 tbsp
  • Salt - to taste
  • Red chilli powder-1 tsp
  • Coriander powder - 1/2 tsp
  • Turmeric powder - 1/2 tsp [optional - I didnt use it]
  • Water - 1.5 cups
  • Cashews - 4 to 5 broken [I used it as whole for garnishing]
To be grinded :
  • Cloves-2
  • Cinnamon-1 inch stick
  • Cardamom - 1
  • Onion - 1/2 medium sized onion
Method:
  1. Rinse rice well twice atleast and soak in water for 30mins. Just sprinkle water in 'to be grinded' list and grind it to a paste, keep aside.

  2. In a pressure cooker, Heat a tsp of ghee, fry the cashews and keep aside. Now add 1tbsp of oil and 1/2 tbsp of ghee. Add bayleaf, jeera, gingergarlic paste, onions and green chillies. Fry for 2-3 minutes.Now add the onion spices mixture and fry for few mins.

  3. Now add veggies with salt and fry for few minutes.The veggies should be crunchy not soft. Add chilli powder, coriander powder and mix well.

  4. Now add the basmati rice and fry for 3 mins. Now add exactly 1.5 cups of water and allow it to boil.

  5. Close and pressure cook it for 8-9 mins. Open and garnish with ghee fried cashews. Add remaining 1/2 tbsp of ghee and mix gently.

  6. Serve with onion raitha or plain curd.
Vegetable Pulao/Pulav Recipe
The aroma of ghee with vegetables in rice with garnished cashews.....hmm yummmmy!! I am not a fan of restaurant pulaos becos most of them have strong flavours of the spices....I like mine to be less flavoured and thats the reason I started trying out pulaos at home :)

Monday, May 31, 2010

Vendaka Thayir Pachadi / Bhindi Raita

I luv okras in any form....after my addiction to kadai bhindi this is next to it. Tried this from Nags space with not much of modifications. I have had this once in Saravana Bhavan as a starter for meals not knowing that this was so simple to make it at home.I can guarantee even those who hate okras will like this.
Bhindi or Okra Raita / Vendaka Thayir Pachadi
Ingredients
  • Vendakka / okra - 10 to 12
  • Onion - 1 medium sized finely chopped
  • Oil - 1tsp
  • Curry leaves - few
  • Mustard seeds - 1/2 tsp
  • Green chillies - 1 finely chopped
  • Cumin seeds / Jeera - 1/2 tsp
  • Thick curd - 1 cup
  • Chilli powder - 1/2 tsp
  • Salt to taste
Method:
  1. Wash and chop the okras into thin rounds .

  2. Heat oil, add mustard seeds let it splutter add jeera fry for a minute, now add onions, green chillies,curry leaves and okra.

  3. Saute for 5-7 mins till onions turn light brown and the okra loses its stickiness.Fry till okras are light crispy. Drain it in a tissue paper to take out the excess oil and keep aside to cool.

  4. Beat curd, add salt. Now add the fried okra mixture and mix well till all is combined.Sprinkle chilli powder on top if needed.
This pachadi goes well with rotis, rice or even as such which is what I did :)

Bhindi or Okra Raita / Vendaka Thayir Pachadi
The nice crunch in the onions with okras dipped in thick curd was yummy......so do give it a try. For me anything dunked in curd has a special place in my tummy so is this one. I luv the vendaka puli pachadi also...will post the recipe sometime soon.

Sunday, May 23, 2010

Apple Poha Custard

I made this Apple Poha Custard from Raks kitchen the only addition I made was poha otherwise just her recipe including measurements. I dont like custard normally but I myself had a cup of this apple poha custard. Dont justify by the click, it was an indoor night click.......but the custard was very tasty.
Apple Poha Custard
Ingredients:
  • Apple - 1 chopped finely
  • Milk - 2 cups
  • Poha - a handful(I used the thick variety)
  • Custard powder - 2 tblsp
  • Sugar - 4 tbsp
  • Elachi powder - 1 tsp (optional)
Method:
  1. Soak poha in water for 5mins, drain water and keep poha aside.

  2. In a small bowl add 5 tbsp milk from 2 cups and dissolve the custard powder into a smooth pasty liquid without any lumps. Keep aside.

  3. Now boil the remaining milk in a non stick kadai/vessel. Keep in low flame and add the custard powder paste to the boiled milk.Stir slowly and well continuosly.

  4. The mixture gets thickened very fast so be very careful after the paste is added. Stir for 2-3 mins, switch of and cool down. The consistency is little thinner thats the way we liked it.

  5. Refrigerate it for atleast an hr. Add chopped apple pieces and poha at the time of serving(Leave atleast 15mins standing time) and mix well. Serve cold.
Apple Poha Custard
The fruits and variations are endless...we can even add nuts or tuti fruits or any other fruits when serving for kids.

If you dont have custard powder in hand dont worry : Substitute 2 tablespoons of cornflour,1/2 tsp of vanilla essence, for the above recipe...Idea from raks kitchen. For apple use vanilla essence so that its a bit neutral and apple taste is appealing.

Sunday, May 16, 2010

Oats Wheat Sesame Crackers / Squares

I tried Rc's sesame sticks and just luved the taste. I modified the recipe a bit instead of APF I added wheat flour.... sure a guilt free snack with the goodness of wheat,oats and sesame! The first pic was clicked 2-3 months before and the second click was the recent one....hence the variation :)
Wheat Sesame Crackers


Ingredients :
  • Wheat flour (Atta) - 1 cup
  • Oats - ½ cup powdered coarsely( I used quaker)
  • Oil - 2 tbsp
  • Butter - 1 Tbsp (add more if you prefer crispy crackers)
  • Sesame seeds - ¼ cup
  • Garlic paste - 3 tsp
  • Salt per taste
  • Baking Powder - ½ tsp
  • Water - as reqd to knead the dough
Method:
  1. ln a bowl add the wheat flour, oats, baking powder, and salt. Add garlic paste, sesame seeds.


  2. Combine well, add oil.Melt the butter lil(mine got melted by itself after I took it out from chiller due to this scorching summer ;))and add at this stage. Add water little by little to form a thick chapathi like dough. Keep aside undisturbed for 30mins.


  3. Divide the dough into half. Roll each half thin and cut into squares or sticks. Combine the scrappings and repeat the same with the other half too.


  4. Preheat oven to 180C for 10 mins. Place the squares on a greased baking sheet and bake for about 15-18 minutes or until the crackers are crisp. The baking time depends on the thickness of the squares and the oven settings


Store in a air tight container. It can be stored upto a week.I strongly recommend adding atleast 1tbsp butter.


Wheat Sesame Crackers


The crackers were crunchy and little crispy...we enjoyed it as a teatime snack.The sesame flavour in every bite was so tasty.