Saturday, November 20, 2010

Dal Tadka / Tadka Dal Fry

When we moved to the new place and the house works were going on, we relied on easy yet nutritious dishes for lunch. Having very little time in hand, and a naughty kiddo all that we could do is such simple meals only. One such days lunch was this simple yet flavorful dal with potato curry and steamed rice....YUM! Do check out the "Coming up next" section which is newly located on the right tab.
Dal Tadka Recipe


Ingredients:
  • Toor dal (Thuvaram Paruppu) - 1 cup [You can use yellow moong dhal too]
  • Tomato - 1 chopped
  • Small Onions - 4 halved
  • Turmeric powder - a pinch
  • Kasoori Methi leaves - 1 tsp
  • Hing - a pinch
  • Salt - to taste
  • Oil - 2 tsp
To Temper :
  • Oil / Ghee - 1 tbsp
  • Mustard seeds - 1 tsp
  • Jeera - 1 tsp
  • Garlic - 3 cloves
  • Dry red chillies - 2 halved
  • Curry leaves - 4 to 5


Dal Tadka Recipe


Method:
  1. Pressure cook dal with enough water and a pinch of turmeric powder until soft or give 3 whistles in a pressure cooker.Drain water, mash the dal once but not too mushy and keep aside.


  2. Heat oil in a pan, add 1/2 mustard seeds and allow it to splutter.Then add jeera, onions, garlic and 1 red chilli one by one and saute for 2-3mins


  3. Now add tomato and saute till raw smell of tomato leaves. Next add salt, hing and sprinkle little water and let it boil for 2mins.


  4. Now add mashed dal, mix well and let it boil for 3 more mins. Add kasoori methi leaves and mix well. Switch off and transfer to a serving bowl.


  5. Heat a tsp of ghee, add remaining 1/2 tsp mustard seeds, 1 red chilli and curry leaves. Allow it to crackle, switch off and transfer this tadka to the dal in the serving bowl .
Tadka is nothing but the seasoning we do with ghee / oil which gives a nice flavour to the simple dal.


Dal Tadka Recipe
[Source : Google]
  • Dal Tadka is a staple dish in several Indian households and is generally eaten with rice or rotis (indian flat-bread).


  • The traditional Dal Tadka Recipe is a preparation made from a variety of different lentils and a lot of spices making it a favourite accompaniment with Rice or Rotis/Naan etc.


  • Dal refers to the dry pulses that come as a result of splitting the whole pulses, and ridding them of their husks/hulls and shells.


  • Dal forms a very important part of the daily Indian meal, as it is one major source of proteins and energy.


  • Dal is generally eaten as accompaniment to Roti or Steamed white rice.Toor Dal or split Pigeon peas are generally used in preperation of this dish.
Dal Tadka Recipe
Anytime comfort and nutrtious dal, do include it in your menu and enjoy!! Happy Karthigai Deepam wishes to all!

Wednesday, November 17, 2010

Pori Urundai for Karthigai Deepam

First of all thanks to everyone for the encouraging words for my previous pizza stepwise post. It made all the efforts I had put in fruitful :)


I am fond of lighting lamps and arranging them outside and inside the house, who doesnt?! This year for blogging sake, made pori urundai in advance. These days my little one has become a choosy eater(now mothers gene at work ;)), But pori is her favorite right from the day she tasted it. So this time when I tried pori urundai at home I made sure to make tiny balls to give it to her, seeing her smile to a mile, I was a contented mother :)
Pori Urundai Recipe


Pori Urundai (Sweet Puffed Rice Balls) Ingredients:
  • Pori / Puffed rice- 3 and 1/2 cups
  • Jaggery - 1/2 cup
  • Water - 1/4 cup or little less than that (It should be just for the level of jaggery to immerse)
  • Elachi powder - a pinch
  • Ghee - 1 tsp to grease hands


Pori Urundai Recipe


Method:
  1. First add jaggery in a wide bottomed bowl, add water and dissolve it well, keep aside for sometime so that the jaggery gets dissolved completely.Now strain using a strainer to remove the impurities and keep aside.


  2. Now switch on stove and add strained jaggery water/syrup in a wide pan and add elachi powder. Stir continously and check it throughout so that we dont leave the consistency.


  3. Consistency check : Keep a seperate bowl ready filled with water.Take a drop of jaggery syrup and put it in water, it should stand firm and not dissolve. It should form a slightly hard but flexible ball when you roll it with your fingers and see. When this consistency is reached, add the pori and switch off.


  4. Now stir well, so that pori gets completely coated with the jaggery syrup. By the time of stirring, the hotness would be hand bearable.


  5. Grease your palms and roll them into tight balls. Dont let it cool else it would be hard to roll them into balls.Store in airtight container and enjoy!


Pori Urundai Recipe
Karthigai Deepam is a festival of lights, celebrated in the Tamil month of Kaarthigai. It is celebrated on the full moon day of the Kaarthigai month which coincides with Krithikai star. It is also considered as the extension of the Deepavali festival. The lighted lamp is considered an auspicious symbol. It is believed to ward off evil forces and usher in prosperity and joy. While the lighted lamp is important for all Hindu rituals and festivals, it is indispensable for Karthigai.


Rows of agal vilakkus (oil lit lamps) in front of every house... this is the image that at once comes to mind when we think of Karthigai Deepam - the festival of lights that is celebrated throughout Tamil Nadu during the month of Karthigai (November-December). Not many of us are aware that it is one of the oldest festivals celebrated in the state, perhaps even before people began celebrating Deepavali and Navarathri.


Pori Urundai Recipe
Hope you all have fun lighting lamps and bursting crackers. See you all in the next post!!

Saturday, November 13, 2010

Homemade Veg Pizza / Paneer Tikka Pizza - Step by Step Recipe

Veg pizza in 2 versions (Normal & Low Fat)
I was postphoning this pizza post just for the reason that I had to write more ;) Also I wanted to compile all the pics with stepwise, and the variation that I had clicked each time I made Pizza. And with no doubt this recipe is a keeper but I made adjustments here and there each time and finally found the recipe for perfect pizzas, So no more pizzas from restaurants. I have tried with 2 different toppings and here am giving u both for normal as well as low fat version.
Pizza pics updated on 22/7/11
Homemade Veg Pizza


Ingredients for Normal Pizza :
[Recipe Source - Raks Kitchen]
  • All purpose flour/Maida - 1 & 1/2 cups [My 1 cup measures 200 gms]
  • Active dry yeast - 1 tbsp [but not a heaped one]
  • Milk - 1/4 cup
  • Water - 1/4 cup
  • Sugar - 1/2 tblsp
  • Salt - 3/4 tsp
  • Olive oil - 2 tbsp
For the topping :
  • Pizza/Pasta Sauce - 1 tbsp
  • Tomato Sauce - 1/2 tbsp
  • Onion - 1/2 chopped
  • Capsicum - 1/2 chopped
  • Grated mozarella cheese - 2 tbsp or as required to cover the topping
  • Pepper powder - 1/2 tsp
For Paneer tikka marinating:
  • Paneer - 10 to 12 small cubes
  • Chilli powder - 1 tsp
  • Turmeric powder - 1/2 tsp
  • Garam masala powder - 1/2 tsp
  • Coriander powder - 1/2 tsp
  • Lemon juice - 1 tsp
  • Curd - 1.5 tbsp


Veg Pizza
Method:
Boil the water first in a wide vessel and keep aside. Now add milk, oil, sugar, salt to boiled water and mix well till sugar dissolves. Now add yeast to the milk oil solution.
Veg Pizza Step1


Mix well and keep aside for 5-7 mins stirring occassionally. After sometime you can see the yeast completely dissolved as shown below. Now add the flour.
Veg Pizza Step2


After adding the flour, gather to get a smooth pilable dough. No need to knead completely just bring it together that is enough.Keep covered with a wet cloth till an hour or 2, preferably in a warm place for best results.

Veg Pizza Step3


When u check after an hr, the dough would have been raised(I wouldnt say its exactly doubled) .Now again punch it down incase for any airbubbles and then keep aside. By the time cut paneer into small cubes add curd, salt, turmeric, chilli, coriander, garam masala powder and lemon juice - Marinate it for 15mins. I usually dont roast the paneer seperately but attimes when I have time in hand I do it and yes this time I toasted it in a tawa with little oil till golden brown. You can also just keep the paneer along with the topping to bake without toasting.
Veg Pizza Step5


Grease a baking tray with aluminium foil [I didnt dust flour or add oil] . Keep the dough on the tray, Now roll the dough a little thick as 1 to 1.5 inches and fold the ends as shown in the below pic. Just fold the ends inside and press it till u get a small depthness.Prick the base with fork to make sure of even cooking [I forget it everytime ;)]. Spread the pizza sauce, I used the readymade maggi pizza sauce.
Veg Pizza Step4
Arrange the toppings - I've used paneer, capsicum and onion here.Then grate the cheese till it covers topping.Just add tomato sauce on top this is purely optional but it tastes good with it. Then sprinkle pepper powder. Preheat the oven for 210 degree Celsius and bake for 15- 20 mins,till the base turns golden brown.If you cut a tiny area with a knife, u can see if its cooked fully by seeing the bread like texture.Mine gets done usually in 20mins, check at 15mins then proceed with the extra 5mins.


Cut the pizzas with pizza cutter/knife, make wedges and enjoy hot and yummy pizza :)


Veg Pizza
The topping combination is endless.To me pizzas are only if they served from Pizzahut but sure homemade pizzas changed my mind :)


Low Fat Version Ingredients :

  • Wheat Flour - 1 cup
  • Maida - 1/2 cup
  • Active dry yeast - 3/4 tblsp
  • Milk - 1/4 cup
  • Water - 1/4 cup
  • Sugar - 1/2 tblsp
  • Salt - 3/4 tsp
  • Oil - 1 tbsp
For the topping:
  • Tomato Sauce - 1tbsp
  • Onion - 1 chopped
  • Capsicum - 1/2 chopped
  • Pepper powder - 1/2 tsp
  • Chilli powder 1/2 tsp [You can alternatively use chilli flakes also]
  • Cheese - 2 tsp grated
  • Paneer cubes - 6 to 8


Low Fat version of Veg Pizza with thin crust/base
Veg Pizza


Except for the ingredients the method is the same just give an extra 3-5 mins while baking as wheat flour takes a little more time than maida.


My Notes :
  • The dough shouldnt be sticky...if so then ur dough is watery so add in a little more flour. Give a slight press while arranging the topping, so that after baked the topping gets nicely blended with the base.


  • It is again a no fail recipe.The only thing to keep in mind is the measurements and the yeast activeness.With the measurement specified above , u can make 2 thin crust pizzas too, it tastes equally gud. If you are opting for one then u will get a big pizza a little bigger in radius than the ones u get in pizzahut.


  • I have tried with normal cube cheese but it never melts and spreads well like mozzarellacheese.If you use other cheese, it will sit in the place u have grated :)


  • Usually I roll the dough in the baking tray with aluminium foil which I opt to place it in oven, this way its messfree as u need not transfer from one to another carefully.


Tuesday, November 9, 2010

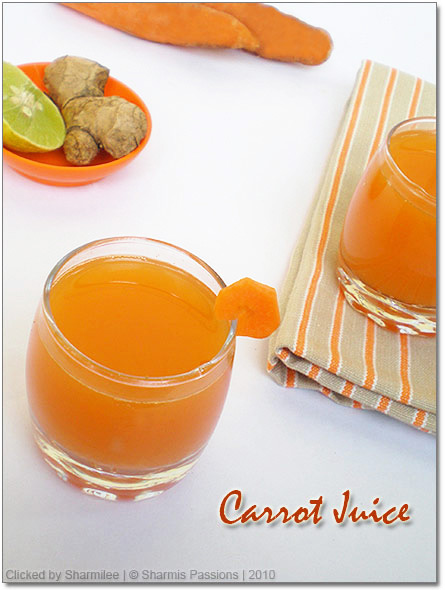
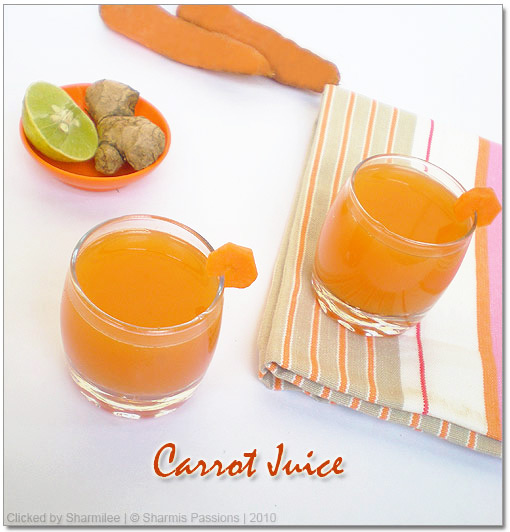
Carrot Juice - The Natural Fanta!

After about 35 days of living with the dust and the smell of paint, all our music was the driller machines sound all these days......Yes finally the interior work is over and we are totally relieved though few works are pending which are very minor. I tell you, it isnt that easy to get things done after occupying.....the house was in a total mess all these days and we are in the process of slowly arranging things. Next comes my job search, hope everything goes smooth :)


About this carrot juice recipe, amma learnt it from our neighbor.Once when it was served, we were clueless that it was from carrots, first we asked was it rasna? we were totally surprised to know that it was carrot juice. It is not only healthy but tasty at the same time, with lemon juice it tastes close to fanta minus the foodcolors and soda. Isn't that interesting?!
Carrot Juice Recipe


Ingredients:

  • Carrots - 2 medium sized cut into small
  • Water - 1 cup
  • Salt - a pinch
  • Sugar - 1 tsp
  • Lemon - 1
  • Ginger - 1/4 inch piece [optional]
Method:
  1. Add carrots and ginger in a blender/mixer with little water say 2 tbsp and blend it until its crushed well. Blend it for 2 times to extract the pulp completely.


  2. Now strain it using a strainer and press the pulp with a spoon, so that the juice is extracted completely.


  3. Then add the extracted carrot juice to a glass, squeeze lemon juice(taking care to omit the seeds), sugar, salt and remaining water and mix well.Recommended to serve cold.


Carrot Juice Recipe


My Notes :
  • If your carrots are sweet enough, then you can reduce sugar to 1/2 tsp or omit the sugar completely.


  • For the above mentioned quantity, it serves 2 small glasses(as in the pic). I picked fresh tender carrots to get the nice orangey color, guess it worked out :)


  • You can make this juice and refrigerate, it keeps well for about a week. Carrots with a dash of lemon makes it all the more healthy and tasty.


  • The recipe calls for ginger, but its purely optional. I sometimes omit it to relish the true taste close to fanta :)


Its truely a tongue tickling drink with the sweetness of sugar and the tanginess lemon brings in. Try this refreshing drink and enjoy yourself. Stay tuned for the next post - Homemade Pizza with stepwise.

Saturday, November 6, 2010

Poha(Aval) Bread Mini Rotis / Poha Bread Tikki?

Bored of aval upma and looking for quick guilt free evening snack this is just perefect for you! I havent deep fried as in the orginal recipe instead toasted it and made it like rotis/tikkis :)
Poha Bread Roti Recipe

Ingredients: [Recipe Source : CookingandMe]
  • Thin aval / poha - 1 cup
  • Bread - 3 slices [I used wheat bread]
  • Onion 1 medium sized, chopped finely
  • Jeera - 1/2 tsp
  • Ginger garlic paste - 1/2 tbsp
  • Green chillies 1 chopped finely
  • Rice flour - 3 tbsp
  • Coriander leaves - 1 tbsp
  • Salt to taste
  • Oil to toast
Method:
  1. Soak poha in 1/2 cup water for 10 mins(not more than that if its thin poha) or until soft. Dip bread in little water, squeeze out water and add it to poha.

  2. Now add the rest of the ingredients to this and mix well to form a thick mixture.Make small balls and flatten them to discs of 1/4 inch thickness.

  3. Add oil in a pan just enough to toast and toast them until slightly browned on both the sides. They arent very crispy like the deep fried ones but softer and tastier.

NOTE : You can alternatively deep fry them too as in the orginal recipe.

Poha Bread Roti Recipe
After flattening them using your hands you can even cut out perfect round shapes using a small lid. But I didnt do it and thats y the irregular circles :) Isnt that a quick and interesting snacky? Do try out and am sure these rotis will not disappoint you.

Tuesday, November 2, 2010

Kaju Katli (Cashew Burfi) for Diwali!

To me Diwali means sweets :) New dresses and crackers comes next. Though am not fond of crackers, I like watching the colorful lights high in the sky and kids playing with great excitement. I am not sure how mittu is going to react to crackers bursting all around, though last year was her first diwali, she was too small to watch the lights.
Kaju Katli Recipe
When I thought of a sweet that would be special and apt for the occassion the 3 sweets I finalised were Jangiri, Badusha and Kaju Katli. But jangiri was nowhere in my reach with the messy kitchen and things all around . Kaju Katli was quick, I am glad I tried, it is so easy yet rich and tasty.
Ingredients:
  • Cashews - 1 cup
  • Sugar - 1/2 cup
  • Water - just to the level of sugar immerses (5 tbsp)
  • Ghee - 1 tsp
Kaju Katli Recipe
Method:
  1. Dry your mixer completely without any moisture and wetness. Now grind the cashew to a fine powder.


  2. Grease the back of a flat plate with few drops of ghee and keep it ready. Grease the chapathi roller with remaining ghee.


  3. Take half cup sugar in a thick wide bottomed pan(preferably non-stick), and pour 5tbsp of water till it get immersed. Mix well till sugar is dissolved completely. Simmer and then keep checking continuously.


  4. The sugar syrup will become sticky, take a drop and check. Next stage is it will get thickened and form bubbles as shown below:
  5. Kaju Katli Recipe
  6. This is the stage , now add the cashew powder and mix well. Dont allow any lumps to be formed, break them incase they are formed.


  7. Keep in low flame itself and keep stirring for 2-3 minutes. The dough will be non sticky and when u take a small piece, roll and see, it should form a very flexible ball as shown in the above pic, it shouldnt break.


  8. Now switch off , allow it to cool for 5mins. Then knead it till a soft dough is formed then transfer this to the greased plate and roll them evenly of 1/4 inch thickness with chappathi roller. Cut them into diamonds and store them in air tight container.
    Kaju Katli Recipe
My Notes :
  • The sugar syrup and the cashew dough consistency is very important, if it becomes a bit thicker than mentioned, then your katlis would be difficult to roll as they will tend to break.


  • You can alternatively use a greased sheet of silver foil which would actually be mess free.


  • This recipe for the above given measurement will yield medium sized 10-13 katlis. I am sure kids will love it!


DIWALI- THE FESTIVAL OF LIGHTS!! [Source : Google]
  • The word Diwali means “rows of lighted lamps”. It is called the “Festival of Lights” because people light diyas (small oil lamps) to welcome the goddess Lakshmi into their homes. Hindus believe that the goddess brings wealth with her when she visits. Hindus place the diyas around their home, by doors and windows, on roof tops, and along outer walls. The lights are left burning all night so that Lakshmi may feel welcomed and enter.


  • Diwali is celebrated for a period of 5 days. Each days has it’s own significance, rituals and myths. The third day is celebrated as the main Diwali festival, and is known as the “festival of lights”. The five days of Diwali are : Dhanteras , Narak Chaturdashi, Deepawali, Govardhan and Bhaidooj.
Though not incidental , I luv the pic below with mittus hands, Isnt it cute? :)) She enjoyed the kajus as well.
Kaju Katli Recipe
And wishing all my readers a very happy and safe diwali. Enjoy, have fun and most importantly play safe!